

Most labs already know their painful failure modes. Ask any manager and they'll rattle off the same short list: a -80 freezer that alarms at 2am, a critical reagent that runs out mid-study, a batch of instrument files that never made it off the acquisition PC. Everyone knows these are the killers. What almost no lab has is a single place where each of those failures is tied to the control that prevents it, the number that tells you it's drifting, and the artifact you'd hand an auditor to prove the control was working.
That gap is the whole problem. Labs manage risk as a collection of loose habits — a freezer log here, a reagent spreadsheet there, an SOP nobody's read since onboarding — instead of as a connected system. A risk register fixes that, but only if you build it as an operational tool rather than a compliance document that lives in a shared drive and gets updated once a year before an audit.
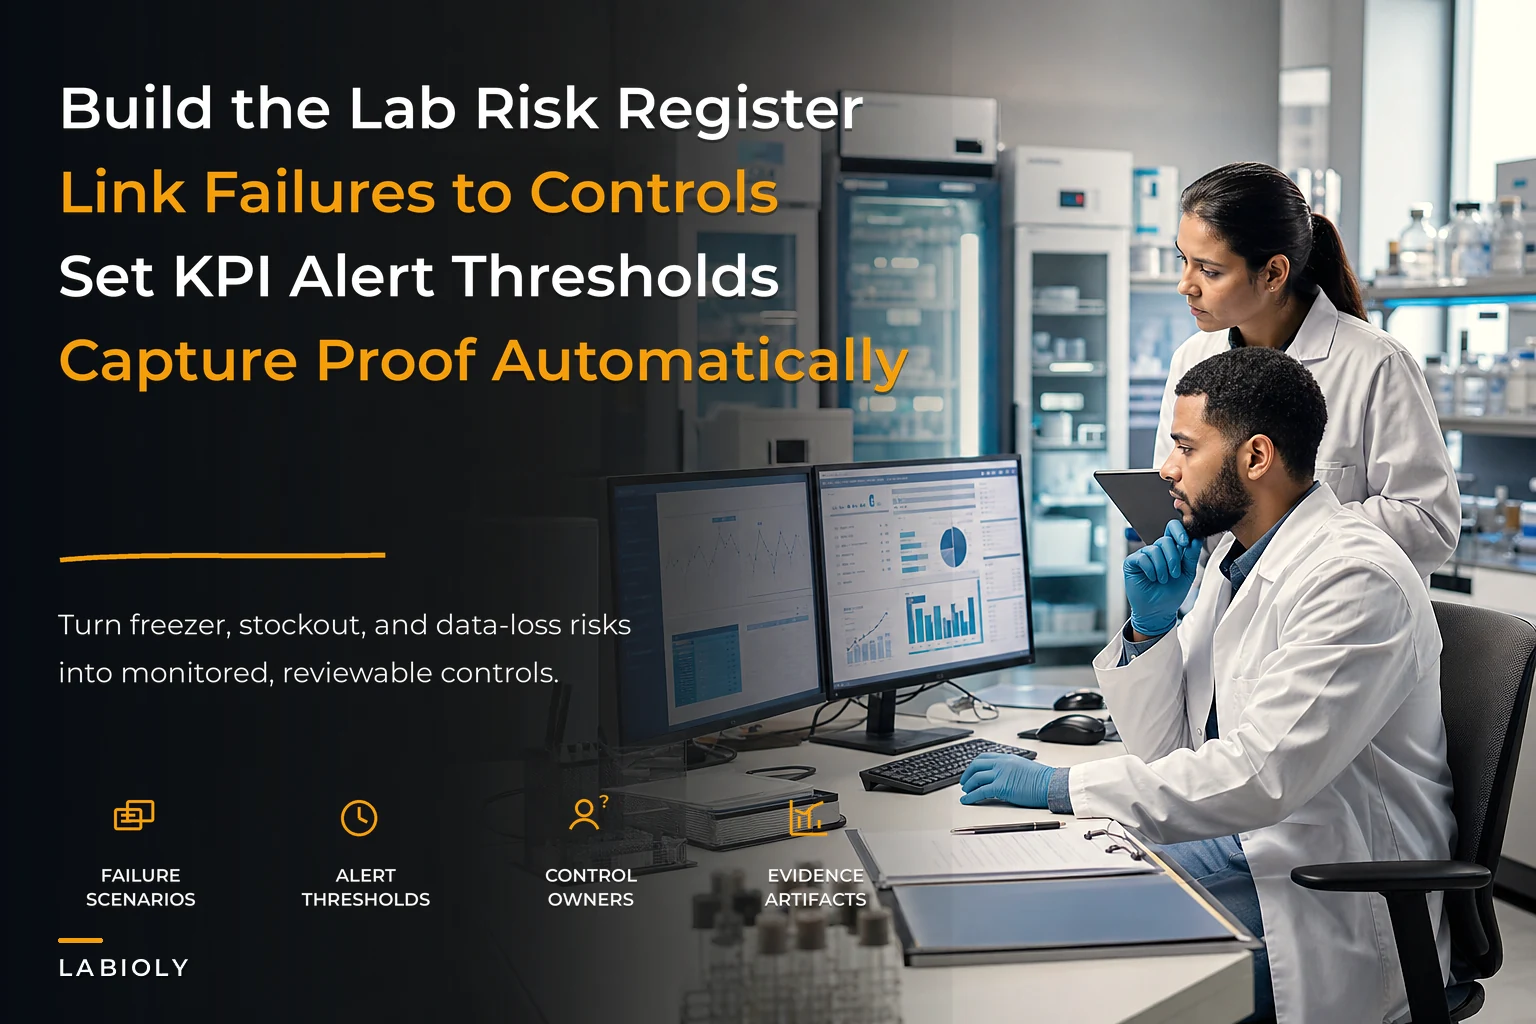
This article is about building a laboratory operational risk register that actually runs your operation: mapping each real failure to a control, a KPI with an alert threshold, and the evidence that proves the control fired. Not a heat-map. Not a color-coded matrix that impresses a quality manager and changes nothing. A working catalog.
Why the "we know our risks" mindset quietly fails
Knowing your risks and controlling them are two different maturity levels, and most labs sit uncomfortably between them.
The pattern shows up constantly. A lab has a freezer alarm system. It has a reagent ordering process. It backs up instrument data. Each of these controls exists in isolation, owned by whoever set it up, fully understood by maybe one person. Then that person goes on leave, or the postdoc who "handled the freezer thing" graduates, and the control silently stops working. Nobody notices because there was never a KPI attached to it — no metric that would light up and say this control has decayed.
The failure isn't that the lab lacked a control. It's that the control had no visible health indicator. A risk register done right forces every control to answer three questions:
-
How do we know it's working right now?
-
What number tells us it's degrading before it fails?
-
What proof do we have that it worked last month?
If a control can't answer those three, it's not really a control. It's a hope.
The three columns that make a register operational
Traditional risk registers stop at "risk → likelihood → impact → mitigation." That's where they die, because none of those columns tell anyone what to do on a Tuesday. An operational register adds the parts that connect risk to daily work.
Eliminate lab bottlenecks and errors.
Labioly helps you monitor, manage, and report lab activities efficiently and compliantly.
- Real-time sample tracking
- Inventory and supply alerts
- Staff workflow coordination
No credit card required
Every row should carry these linked fields:
-
Failure mode — the specific bad outcome, written concretely (not "equipment failure" but "chest freezer excursion above -65°C for >30 min").
-
Control / SOP — the procedure that prevents or contains it, with a document ID.
-
KPI + alert threshold — the measurable signal and the point at which someone gets pinged.
-
Evidence artifact — the exact record that proves the control ran (log export, signed form, checksum manifest).
-
Owner — a role, never a name. Names leave. Roles don't.
The magic is in the linkage. When a KPI breaches its threshold, the register already tells you which SOP governs the response, who owns it, and what evidence needs to be captured during remediation. You've collapsed the gap between "something's wrong" and "here's the documented response" into a single lookup.
Mapping the three classic failures
The three failures nearly every lab shares — freezer excursions, stockouts, and data loss — show how differently the same register structure applies across risk types.
Freezer and cold-chain excursions
The naive control here is "we have alarms." The problem is that alarms are a detection control, not a prevention one, and they only work if someone acts on them fast enough to matter.
The real failure chain looks like this: a compressor starts struggling, temperature drifts up slowly over hours, the alarm fires at the threshold, the on-call person doesn't see the text until morning, and by then a shelf of irreplaceable primary samples has thawed. The alarm "worked" and you still lost everything.
So the KPI can't just be "alarm fired / didn't fire." You need a rate-of-change metric and an acknowledgment-time metric. Something like: temperature rising more than 3°C/hour triggers an early warning well below the hard limit, and any alarm not acknowledged within 15 minutes escalates to a second contact. The evidence artifact is the alarm log plus the acknowledgment timestamp — because in an audit, "we got alerted" means nothing without "and here's who responded and when."
Reagent and critical-supply stockouts
Stockouts feel like a procurement problem, but operationally they're a forecasting and lead-time problem, and the register has to reflect that. A single critical antibody with a 12-week lead time carries far more operational risk than ten commodity reagents you can get overnight, even if the antibody is cheaper.
The control here is a reorder policy tied to consumption rate and vendor lead time, which pairs naturally with the kind of vendor governance most labs underinvest in. If you haven't built risk-based scorecards and critical-spare policies, the register will keep flagging stockout risk you have no real way to act on — worth pairing this row with the thinking in Procurement and Vendor Governance for Critical Lab Supplies.
The KPI is days-of-cover per critical SKU, with an alert threshold set at the reorder point plus a safety buffer sized to lead-time variability. The evidence artifact is the reorder record and the inventory snapshot at the time of the alert. What trips labs up: they set one threshold for all items. A flat "reorder at 20% remaining" rule is useless when your items range from next-day to three-month lead times.
Instrument data loss
Data loss is the quietest failure because it's often invisible until you need the file that isn't there. Files sit on a local acquisition PC, someone assumes they're backed up, the drive fills or fails, and nobody knows until a reviewer asks for raw data from a run six months ago.
The control is an automated transfer-and-verify pipeline, and the KPI that matters is reconciliation completeness — the percentage of expected files that arrived at their destination intact, verified by checksum, within an expected window. The alert threshold is any gap: one missing or mismatched file should flag, not a big batch. The evidence artifact is the reconciliation manifest showing source, destination, checksum match, and timestamp. This row sits inside your broader data governance program, and if that foundation is shaky, the register row will paper over a deeper problem — the operational data governance framework is where that structure belongs.
A worked slice of the register
Here's what a few rows actually look like when you connect all the fields. This is the format that turns the register from a document into a control panel.
| Failure mode | Control / SOP | KPI + alert threshold | Evidence artifact | Owner (role) |
|---|---|---|---|---|
| -80 excursion >-65°C, >30 min | Alarm + tiered escalation SOP | Rate-of-rise >3°C/hr (early warn); ack time >15 min (escalate) | Alarm log + ack timestamp | Cold-storage lead |
| Critical reagent stockout | Lead-time-based reorder policy | Days-of-cover < reorder point + buffer | Reorder record + inventory snapshot | Procurement owner |
| Instrument file loss | Auto transfer + checksum verify | Reconciliation completeness < 100% | Checksum reconciliation manifest | Data steward |
| Sample mislocation | Rack-map + check-in/out SOP | Location-mismatch rate > 1% on audit | Location audit export | Sample custodian |
| Expired reagent in use | Expiry-block + lot-trace rule | Any use event past expiry date | Lot-usage log flag | QC lead |
None of these thresholds are round or arbitrary — they're derived from what the failure actually requires to prevent damage. That's the difference between a register that gets used and one that gets ignored: the numbers have to mean something operationally, not just look tidy in a cell.
Choosing thresholds without guessing
The hardest part of this whole exercise isn't listing risks — it's setting alert thresholds that fire early enough to act on but not so often that people mute them. Alarm fatigue kills more control systems than any technical failure.
-
Set two thresholds, not one. An early-warning level that gives you time to intervene, and a hard-limit level that means damage is happening. A single threshold forces you to choose between too-late and too-noisy.
-
Anchor thresholds to consequence timing. For a freezer, the question is: how long until damage? Set the early warning at consequence-time minus response-time. If damage starts at four hours and your response takes one, warn at three.
-
Tie stockout thresholds to lead-time variability, not just averages. If a vendor's lead time swings from 6 to 14 weeks, your buffer has to cover the bad weeks, not the average one.
-
Make data thresholds zero-tolerance. For file reconciliation, anything less than complete should flag. Data loss doesn't have a "small acceptable amount."
This is also where a register connects back to the metrics you already track. If you've done the work of separating operational signals from noise — the distinction laid out in an operational KPI and capacity-planning system — your register thresholds should draw from those same real signals rather than inventing a parallel set of numbers nobody watches.
When this makes sense — and when it's overkill
Not every lab needs a full register on day one, and pretending otherwise leads to the exact document-that-nobody-updates outcome we're trying to avoid.
This makes sense when: you're running multiple concurrent projects, you have irreplaceable materials, several people share responsibility for the same controls, or you're heading toward an audit or accreditation. The moment a control's owner isn't the only person who understands it, you need the register.
This is overkill when: you're a two-person lab where everyone sees everything and the failure modes are genuinely low-consequence. Building an elaborate register there is process for its own sake. Start with your top three failures and grow it from there.
Who should not do this yet: labs whose underlying controls don't exist. A register is a layer on top of working SOPs and monitoring. If you don't have alarms, backups, or a reorder process at all, build those first. The register catalogs and connects controls — it can't substitute for having them.
A real scenario
A mid-sized translational research lab — around 18 people, running several sponsored studies at once — kept hitting the same category of near-miss. Over roughly a year they'd had two freezer scares, one reagent stockout that stalled a study for about three weeks, and a data gap discovered only when a sponsor requested raw files.
None of these were caused by missing controls. They had alarms, a reagent spreadsheet, and a backup script. What they didn't have was any signal that these controls were quietly degrading, and no single owner clearly accountable for each one. They built a register along the lines above — around 20 rows to start, focused only on failures that had actually bitten them or clearly could. The change wasn't dramatic overnight. What shifted over the next couple of quarters: the freezer early-warning threshold caught a failing compressor about six hours before it would have alarmed, giving them time to move samples. Days-of-cover tracking flagged two reorders that would otherwise have slipped. The reconciliation KPI surfaced a handful of missing files within days instead of months. The harder-to-measure win was audit readiness. When a sponsor asked how they managed cold-chain risk, they had one document showing the control, the threshold, the escalation path, and the evidence trail — instead of assembling a story from three people's memories. That single artifact did more for sponsor confidence than any amount of verbal reassurance.
Keeping the register alive
The register's biggest enemy isn't building it — it's decay. A register that's accurate on day one and wrong six months later is arguably worse than none, because people trust it.
Two habits keep it honest. First, review it whenever a real incident or near-miss happens: did the register predict it, and did the control and threshold behave as documented? Incidents are free calibration data. Second, review ownership on any staffing change. The most common way a register goes stale is that a role changes hands and nobody reassigns the rows, so the control quietly loses its owner.
Software helps here, but not the way vendors usually pitch it. The value isn't a fancy dashboard — it's automating the boring linkage. When a threshold breach automatically pulls up the right SOP, notifies the current role-owner, and starts capturing the evidence artifact, the register stops depending on human diligence to stay connected. Monitoring rules that generate their own evidence trail mean the "prove the control worked" column fills itself instead of becoming a scramble before an audit. That's where AI-assisted monitoring earns its place — quietly watching the KPIs, catching the slow drifts a person would miss, and keeping the failure-to-response gap as short as possible.
Review the register after each incident — incidents are free calibration data.
A simple workflow shows how a threshold breach should flow into notification, SOP action, and evidence capture.
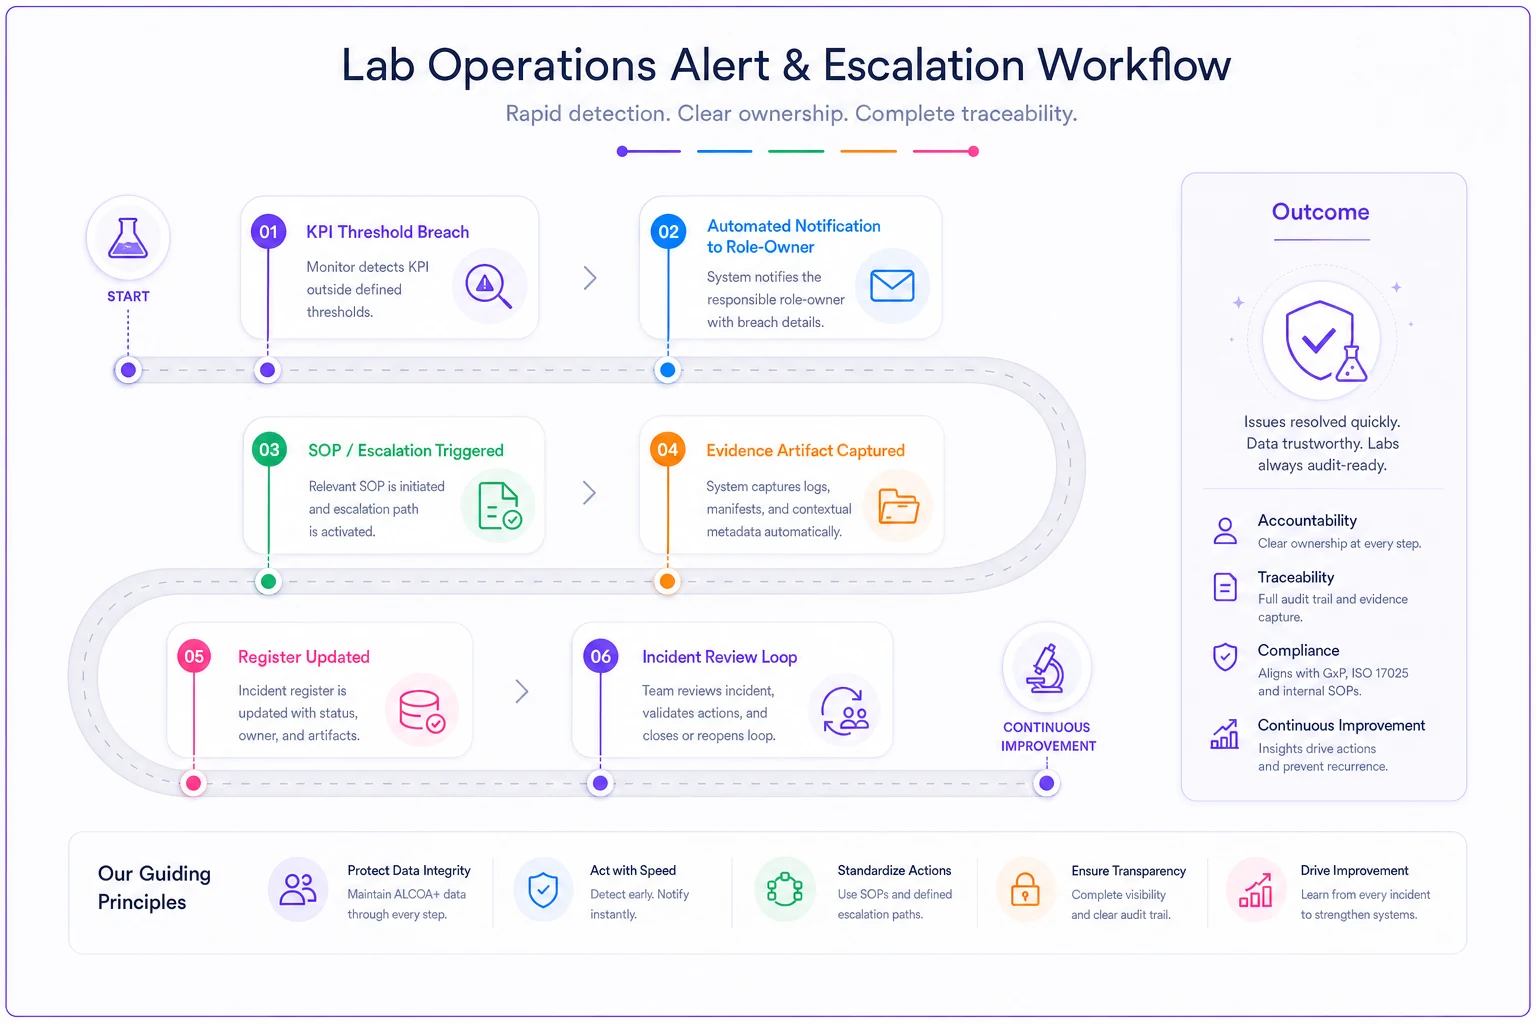
The tooling is helpful when it reduces manual work: auto-link the SOP, notify the role, capture the log, and attach the artifact to the register row.
The tooling is secondary though. The register works because it forces a discipline most labs skip: every risk you actually care about gets a control, every control gets a number that reveals its health, and every control leaves proof it ran. Build that structure honestly around your real failure modes, keep it current, and you've turned a pile of disconnected habits into an operation that can see its own weak points before they cost you samples.
Ready to upgrade your lab operations?
Join 500+ labs using Labioly to save time, reduce errors, and enhance productivity and compliance.