


The worst part of a freezer failure isn't the alarm. It's the twenty minutes after the alarm, when three people are standing in front of a warming -80 with dry ice on order, no clear list of what moves first, and a growing suspicion that half the racks inside aren't labeled well enough to make fast decisions. That's where irreplaceable samples get lost—not because the compressor died, but because nobody decided in advance what happens in the first hour, the first day, and the first week.
Most labs have a "freezer resilience backup power plan lab" checklist somewhere. Usually it's a single line in a safety binder: "If freezer fails, contact facilities and move samples." That sentence is worthless at 2 a.m. This post breaks the response into three tiers—immediate triage, 24–72 hour contingency, and long-term restitution—with the actual mechanics that make each tier work: prioritized transfer lists, vendor fallback protocols, and incident logs that hold up when a sponsor or IRB asks what happened.
Why freezer response falls apart mid-outage
The failure mode is almost always the same. Labs plan for prevention—backup power, alarm callouts, service contracts—and then treat the actual response as improvisation. Prevention buys you time. Response decides whether you keep your samples.
A -80°C chest or upright typically holds temperature somewhere between 4 and 8 hours after power loss if you keep the door shut, depending on fill level and ambient conditions. A full freezer holds cold longer than a half-empty one, which is the opposite of what people assume when they panic and start pulling everything at once. The moment someone opens the door "just to check," you've spent a chunk of that thermal buffer.
The real problems aren't thermodynamic. They're operational:
-
Nobody knows the transfer order, so people grab whatever box is in front.
-
The backup freezer is already 80% full, so there's no landing space.
-
The dry ice vendor's answering service opens at 7 a.m.
-
The person with the freezer map is on vacation and not answering.
-
Three months later, a sponsor asks for the excursion timeline and all anyone has is a group-chat screenshot.
Each of these is fixable before an outage. None of them is fixable during one.
Tier 1: Immediate triage (first 0–60 minutes)
The goal of Tier 1 is narrow: stabilize temperature, avoid making things worse, and buy time. You are not trying to fully rescue every sample in the first hour. You're trying to not lose the buffer you have.
Eliminate lab bottlenecks and errors.
Labioly helps you monitor, manage, and report lab activities efficiently and compliantly.
- Real-time sample tracking
- Inventory and supply alerts
- Staff workflow coordination
No credit card required
The first-hour sequence
-
Confirm the failure is real. Check the independent probe reading, not just the freezer's own display. A tripped alarm on a freezer holding at -78°C is a different situation than one that's climbed to -55°C. Roughly a third of "failures" that get escalated are alarm faults, door-ajar events, or a probe glitch—not compressor death.
-
Keep the door shut and log the time. The single most important number in the entire incident is the timestamp of failure and the last known good temperature. Write it down immediately. Everything downstream depends on it.
-
Start the transfer decision, don't start transferring yet. Pull the prioritized transfer list (covered below). Decide whether you need to move anything based on current temp and predicted hold time. If the freezer is at -76°C and facilities says power returns in 40 minutes, opening the door to transfer may do more harm than waiting.
-
Notify the escalation chain. One primary, one backup, one facilities contact. Not a group text—a defined sequence where each person confirms receipt.
-
Secure landing space. Before you move a single box, confirm where it's going and that the destination has room and is holding temp.
The mistake that comes up over and over is inverting steps 3 and 5. People start hauling boxes to a backup freezer nobody verified, discover it's full or itself marginal, and now have samples warming on a benchtop with nowhere to go.
Tape a printed prioritized transfer list inside the freezer room door.
A quick visual of the first-hour workflow can make the sequence easy to follow.

What "prioritized" actually means
A transfer list isn't a full inventory. It's a ranked subset. When you can only move 15 boxes in the door-open window before the destination gets crowded or the source warms too much, you need to know which 15.
| Priority tier | Sample type | Transfer window target | Why it ranks here |
|---|---|---|---|
| P1 | Irreplaceable clinical/patient samples, sole-source primary cells | Move first, within 15 min | Cannot be regenerated; consent-linked; often the whole reason the study exists |
| P2 | Active-study aliquots with pending assays this week | Within 30 min | Timeline-critical; loss delays deliverables |
| P3 | Reagent stocks, antibodies, enzymes | Only if space/time remains | Replaceable via purchase, though costly and slow |
| P4 | Archived/completed-study material with backups elsewhere | Do not move; monitor only | Redundant copies exist; not worth the door-open cost |
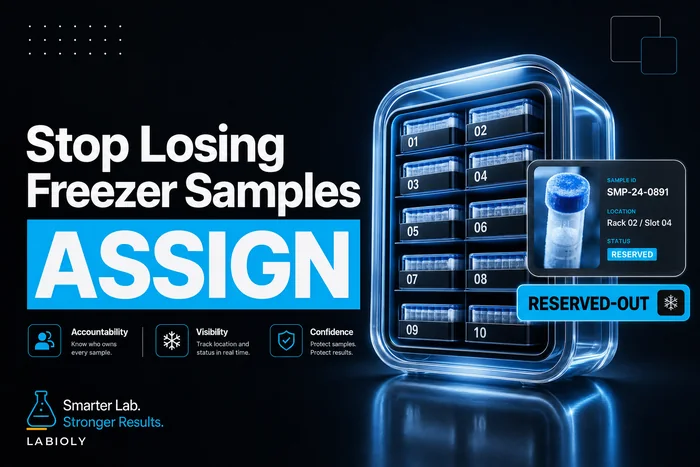
The tiering has to be decided before the outage and physically encoded—colored box lids, a rack map, a printed list taped inside the freezer room door. Good rack-level organization is what makes this list usable under pressure; if you're still fighting basic sample findability, the rack-mapping and assignment approach for shared freezers is the prerequisite to any of this working when things go sideways.
Tier 2: 24–72 hour contingency
If power or the freezer isn't coming back quickly, you shift from "buy time" to "sustain." This is the tier most plans skip entirely, and it's where samples quietly die three days in because the dry ice ran out over a weekend.
Vendor fallback protocols
Dry ice. Your primary supplier may not deliver on Sundays or may cap quantities. You need:
-
Primary supplier account number, after-hours line, and typical lead time.
-
A secondary supplier (often a welding-gas or grocery-distribution vendor) pre-vetted.
-
Known on-hand consumption rate—a well-packed cooler of samples on dry ice burns roughly 5–10 lb per day depending on insulation and open frequency. Order for the full expected duration plus margin, not day by day.
Backup freezer capacity. "We'll use the freezer down the hall" fails when that freezer is near-full. Maintain a standing agreement with a neighboring lab or core facility for emergency capacity, and know the actual free-space number—not the assumed one.
Rental/loaner units. Some regions have 24-hour freezer rental services with same-day -80 delivery. Know whether yours does before you need it. Lead time on a loaner can run anywhere from 6 to 48 hours, which puts it squarely in the Tier 2 window.
This is where treating your outage vendors like any other critical supply chain actually matters. The same discipline you'd apply to reagents—SLAs, vetted alternates, risk scoring—belongs here too. If you've already built vendor governance and critical-spare protocols for lab supplies, extend that framework to cover dry ice, loaner units, and emergency capacity partners.
The 24–72 hour monitoring loop
-
Independent probe check every 2–4 hours, logged with time and initials.
-
Dry ice top-up before the level drops below one-third, never after.
-
A handoff protocol so the person leaving at end of shift formally transfers responsibility—including current temp, dry ice remaining, and next reorder trigger—to the incoming person.
The weekend gap is the classic killer. Outage starts Friday afternoon, everyone assumes someone else is covering Saturday, and by Monday the cooler is warm. A named on-call rotation with explicit weekend coverage closes that hole.
Tier 3: Long-term restitution
Once temperature is stable and the crisis is over, restitution is about answering three questions: what was affected, what's still viable, and what the record shows.
Excursion assessment, not blanket disposal
Not every sample that saw -60°C for two hours is dead. Blanket "throw it all out" decisions are as wrong as pretending nothing happened. For each affected sample category, you need a documented viability judgment:
-
What was the maximum temperature reached and for how long?
-
What's the known stability tolerance for that sample type at that temperature?
-
Is there a functional check available—viability stain, activity assay, re-QC—to confirm rather than assume?
A typical example: a box of serum aliquots that reached -55°C for about 90 minutes may be perfectly fine for most analytes, while cell suspensions in that same box might not survive. Same excursion, different outcomes. The record has to capture the excursion so anyone downstream can make an informed call.
Audit-ready incident logs
This is the part that separates a professional response from a scramble. Six months later, a sponsor audit or IRB query will ask: what happened, when, what was affected, and what you did about it. If your answer is reconstructed from memory and a text thread, you have a problem.
-
Failure timestamp and last known good temperature (the number you wrote down in minute one).
-
Detection method—alarm, routine check, walk-by.
-
Temperature timeline—probe readings throughout the excursion, timestamped.
-
Actions taken—transfers, dry ice, vendor contacts, with times.
-
Affected inventory—which racks, boxes, sample IDs saw excursion.
-
Viability disposition—per category
retained, retested, discarded, with justification.
-
Root cause and corrective action—compressor, power, human error, and what changed to prevent recurrence.
For any clinical or translational material, this log connects directly to your custody record. An excursion is a custody event, and the audit-ready chain-of-custody documentation for translational samples should have a place to record temperature deviations against specific sample IDs—not just where a sample was, but the conditions it experienced.
A real scenario: how this plays out
A mid-sized immunology lab—roughly a dozen researchers, three -80 units holding a mix of patient PBMCs, serum banks, and reagent stock—lost a compressor on a Friday evening. Their old "plan" was the one-line binder entry.
What happened without a tiered plan (their previous near-miss, about a year earlier): A different unit had failed and it took around 40 minutes to find someone with the freezer map, another hour to locate dry ice, and in the scramble they moved reagents before patient samples because those boxes were on top. They lost a partial set of primary cells they couldn't recover. No usable timeline existed afterward; the excursion write-up took days to reconstruct and still had gaps.
After building the tiered playbook: When the compressor died the second time, the on-call researcher confirmed the failure against the independent probe within about 10 minutes, logged the failure time and a last-good reading of -79°C, and pulled the printed priority list taped to the door. P1 patient PBMCs moved first into pre-verified space in a neighboring lab's freezer. Dry ice arrived from the pre-vetted secondary vendor because the primary was closed for the weekend. Weekend coverage was already assigned, so the cooler got topped up Saturday and Sunday.
Total irreplaceable sample loss: none. The incident log was essentially complete by the time the unit was repaired, because it was filled in as events happened rather than reconstructed afterward. When a sponsor later asked about the excursion, the answer was a two-page timeline instead of an apology.
The difference wasn't better equipment. It was deciding the order of operations before the alarm went off.
When a full tiered plan is overkill
Not every freezer needs this. If a unit holds only replaceable reagents with documented reorder paths, a lightweight plan is fine—monitor, and if it fails, order replacements. Building elaborate transfer priorities for boxes you can repurchase in a week is wasted effort.
The full three-tier treatment earns its keep when a freezer holds anything irreplaceable: consented human samples, sole-source cell lines, multi-year longitudinal banks, or material tied directly to study deliverables. For those, the cost of an hour of confusion is measured in lost science, not lost dollars.
Who should not rely on improvisation: any lab with patient-derived or consent-linked material, any lab under sponsor or regulatory audit exposure, and any lab where a single freezer failure could set a project back months. If that describes your lab and your plan is still a one-line binder entry, that's the gap to close first.
Where software quietly helps
None of this requires software to function—a printed list and a disciplined on-call rotation get you most of the way. But a couple of failure points are worth automating.
Continuous temperature logging with independent probes removes the "who checked and when" ambiguity and produces a timestamped excursion timeline automatically, which is exactly what the incident log needs. Keeping your prioritized transfer list, rack maps, and vendor fallback contacts inside the same operational platform that manages your inventory means the list is current and findable at 2 a.m., instead of living in a document someone last updated two years ago. The value isn't the automation itself—it's that the right information is accurate and in reach at the exact moment you can't afford to go looking for it.
Bringing it together
Freezer resilience isn't one plan—it's three responses stacked on different timescales. Tier 1 buys time and avoids self-inflicted damage in the first hour. Tier 2 sustains samples through the days when dry ice, backup capacity, and weekend coverage decide the outcome. Tier 3 tells the truth afterward, with a viability assessment and an incident log that holds up under scrutiny.
Build the prioritized transfer list before you need it. Vet your dry ice and loaner vendors before the primary is closed. Assign weekend coverage explicitly. And log the failure time in the first minute, because every decision you make afterward depends on that one number. The freezer will fail eventually. Whether you lose samples is decided long before the alarm ever sounds.
The freezer will fail eventually. Whether you lose samples is decided long before the alarm ever sounds.
Ready to upgrade your lab operations?
Join 500+ labs using Labioly to save time, reduce errors, and enhance productivity and compliance.