

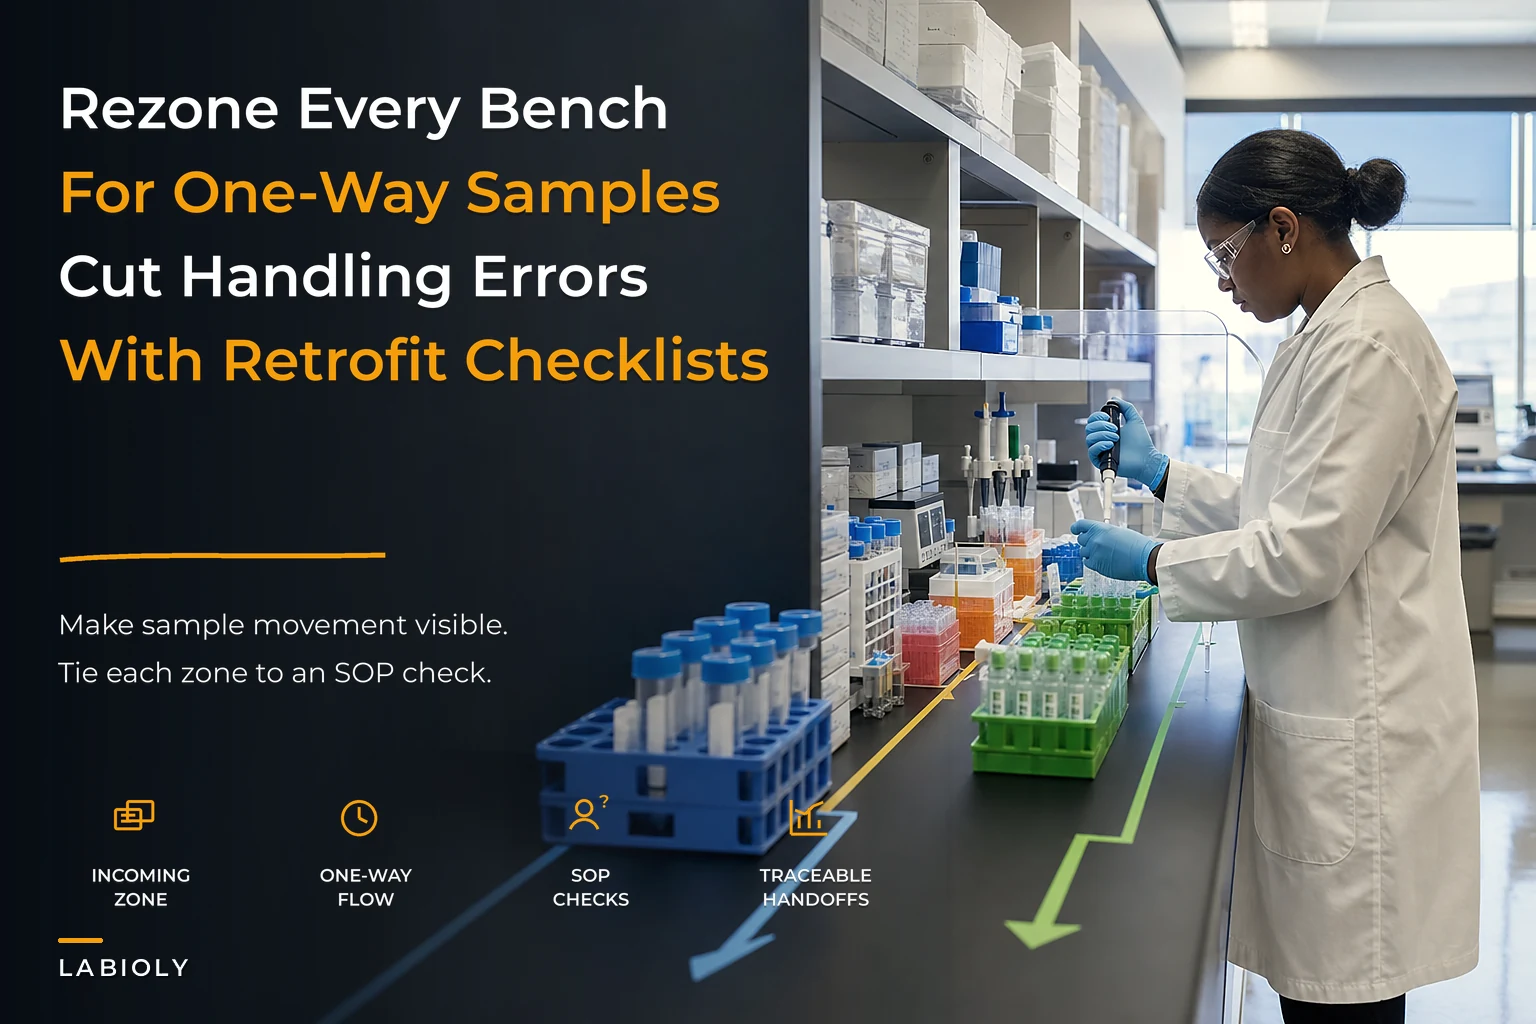

Most handling errors don't start with a careless pipetting step. They start with a bench that forces people to cross paths, backtrack, or set a tube down in a spot that also holds three other people's tubes. The layout is doing the sabotaging, and everyone blames the technician.
If you've ever traced a mislabeled aliquot or a cross-contamination event back to its origin, there's usually something consistent about it: the error almost always happens at a transition — where a sample moves from one task to another, from one person's hands to another's, or from clean work to dirty work. Those transitions happen at physical points in the room. Which means the room itself is part of your quality system, whether you've mapped it that way or not.
This isn't a decorating guide. The goal here is to show how bench layout, sample flow, and your SOPs are one connected system — and how to retrofit an existing lab without a greenfield build, so the physical space stops generating errors that your paperwork can't catch.
Why layout errors hide so well
Layout problems are sneaky because they don't produce a clean signal. A drifting instrument shows up in control charts. A bad reagent lot shows up in a QC failure. But a bench that causes someone to grab the wrong rack shows up as "human error, retrained operator" in your CAPA log. The root cause gets buried under a training note, and three months later the same thing happens at the same bench to a different person.
What you tend to see in small and mid-sized labs is a consistent pattern: the physical space evolves by accretion. A new instrument arrives and gets placed wherever there's an open outlet. A second project shares the same bench because there's no other bench. A centrifuge ends up on the far side of the room from the prep area because that's where it fit. Nobody designed this. It just accumulated. And every one of those decisions added a step, a crossing, or a shared surface that raises the odds of a handling mistake.
The mistake most managers make is treating layout as a facilities issue rather than a quality issue. Facilities cares about square footage, power, and ventilation. Quality cares about whether a positive control can physically touch a test sample. Those two conversations rarely happen together, and the gap between them is where handling errors live.
The three design patterns that actually matter
There's a lot of theory around lab design, but for reducing handling errors, three patterns carry most of the weight: zoning, one-way flow, and visual controls. They work together. Any one of them alone helps a little; all three together change your error profile.
Eliminate lab bottlenecks and errors.
Labioly helps you monitor, manage, and report lab activities efficiently and compliantly.
- Real-time sample tracking
- Inventory and supply alerts
- Staff workflow coordination
No credit card required
Zoning means dividing bench space by function and contamination risk, then enforcing that samples and materials don't cross zone boundaries without a defined step. A simple scheme might include: reagent prep, sample accessioning, active processing, and waste/decon. The point isn't the labels — it's that each zone has a clear job and clear boundaries, and nothing just sits in the wrong one.
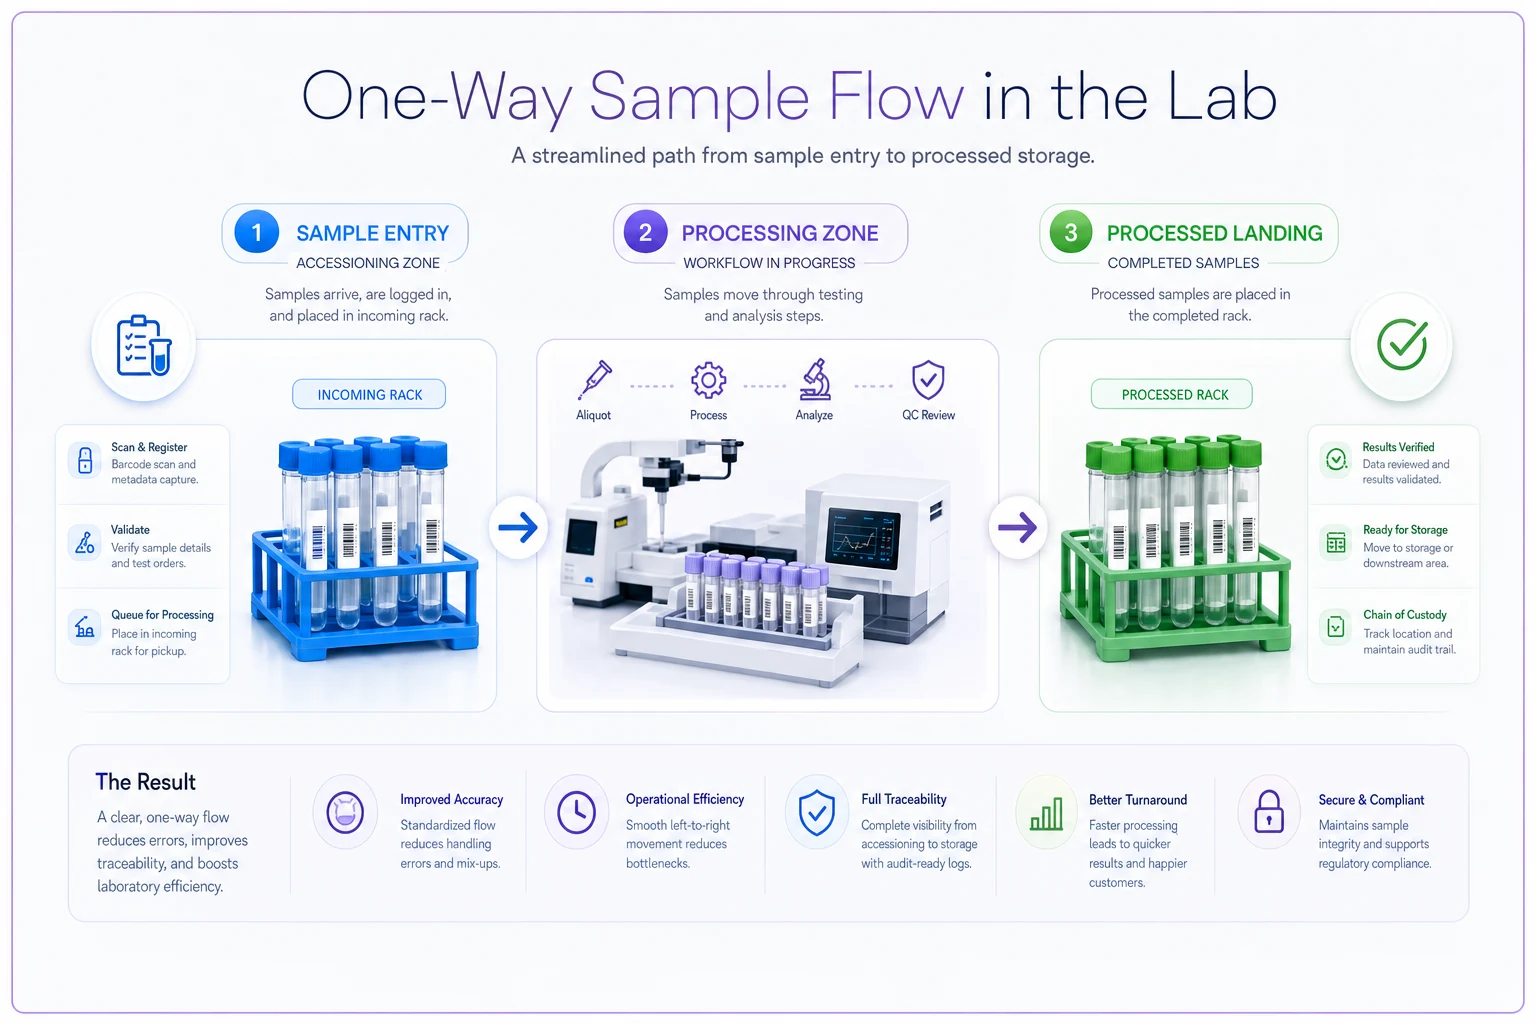
One-way flow means samples move through the room in a single consistent direction, without doubling back over surfaces they've already occupied. Borrowed directly from clean manufacturing and food processing, it works because backtracking is where mix-ups happen. When a sample never returns to a surface it's already touched, the opportunity for "wait, which tube is this" drops sharply.
Visual controls are the cheap, high-leverage layer: color-coded zones, taped floor lines, dedicated racks by color, labeled landing spots for "incoming" vs "processed," and shadow boards for shared equipment. Visual controls turn your SOP into something the eye enforces automatically, instead of something people have to remember.
Here's how the three compare in terms of effort and payoff:
| Pattern | Retrofit cost | Time to implement | Main error type it prevents | Depends on |
|---|---|---|---|---|
| Zoning | Low–medium | 1–2 weeks | Cross-contamination, wrong-material grabs | Clear SOP boundaries |
| One-way flow | Medium | 2–4 weeks | Sample mix-ups, re-processing errors | Zoning already in place |
| Visual controls | Low | Days | Wrong-rack, wrong-landing-spot errors | Both of the above to be meaningful |
The dependency column matters. Visual controls on top of a chaotic, un-zoned bench just make the chaos colorful. Zone first, flow second, visual controls to lock it in.
What breaks at scale
A single technician working one project at one bench rarely runs into layout-driven errors, because they hold the whole flow in their head. The physical design doesn't matter much when one person owns the entire process.
The trouble starts when you have two or more people sharing bench space, or one person running two or more projects at once. That's the threshold where the room's design starts mattering more than any individual's care level. A typical example: a lab grows from three to seven people over a year, keeps the same bench footprint, and starts running overlapping projects. Suddenly two people are accessioning samples at the same bench simultaneously, using the same rack positions, and the mislabel rate creeps up. It's not that the new hires are worse — the space was just never designed for that kind of concurrency.
At scale, four things tend to break at once:
-
Shared landing zones get overloaded. The one open spot near the centrifuge becomes where everyone puts everything.
-
Flow direction becomes inconsistent. Person A moves left-to-right, Person B moves right-to-left, and they collide over a shared surface.
-
Temporary placements become permanent. A tube set down "for a second" during a phone interruption becomes an untracked sample.
-
The SOP and the space diverge. The written procedure says one thing; the bench forces another. People follow the bench, not the SOP.
Layout is a coordination problem, not just a tidiness problem. It connects directly to how you've designed your sample handoffs. If you've worked through your end-to-end sample lifecycle with clear state maps and handoff points, the physical layout should mirror those states — each handoff should have a physical place it happens, not a "wherever there's room" default.
Tying layout to your SOPs and bench checklists
The part most labs skip: your zoning and flow decisions need to live inside your SOPs, not just on the floor tape. A taped zone that isn't referenced in any procedure will fade — literally and organizationally — within a few months.
The connection works like this. Every processing SOP should specify which zone each step happens in and where the sample lands before and after that step. Instead of "centrifuge the sample," the step reads "transfer sample from the accessioning landing rack (blue) to the processing zone, centrifuge, then place in the processed landing rack (green)." Now the SOP encodes the flow, and the visual controls make the SOP self-checking.
Then you build a short bench-open and bench-close checklist that verifies the physical state matches the design. A quick bench checklist might look like:
-
All landing racks empty of yesterday's samples (nothing orphaned overnight)
-
Blue "incoming" and green "processed" racks in correct zones, not swapped
-
No reagents sitting in the sample-processing zone
-
Decon zone stocked and waste containers below fill line
-
Shared equipment returned to its shadow-board spot
-
Zone boundary tape/markers intact and visible
-
Any temporary equipment from yesterday removed or formally relocated
This takes under three minutes and catches the slow drift that erodes every layout redesign. The labs that keep their new layout are the ones that turned it into a daily two-minute verification. The ones that let it decay redesigned the room, celebrated, and never built a mechanism to keep it that way.
Pin a photo of the correct bench state at each bench so the close-out checklist becomes a quick visual match rather than a subjective judgment.
There's a people dimension here too. Layout only works if everyone reads the zones the same way, which ties into how you train and verify staff. A zone-and-flow competency check fits naturally into a broader role-based competency program — you're not just certifying that someone can run an assay, you're certifying they understand and follow the room's flow logic.
A retrofit process for existing labs
You don't need a renovation budget. Most of this is tape, racks, color, and a few relocations. Here's a sequence that works in an occupied, running lab without stopping science for a week.
-
Map the current flow before touching anything. Walk one real sample from arrival to storage and draw every place it lands, every surface it touches, and every time it crosses paths with another sample. Photograph each landing point. This "as-is" map is your baseline, and it almost always reveals two or three crossings nobody realized existed.
-
Identify contamination-risk adjacencies. Mark every spot where a control, a positive sample, and a test sample can occupy the same surface. These are your priority fixes.
-
Define your zones on paper first. Draw the zones on your floor plan. Keep it simple. Assign a color to each. Don't optimize for perfection — optimize for "no sample ever backtracks."
-
Establish one-way flow direction. Pick a direction that matches how samples actually enter and where they end up. Keep it consistent across all projects sharing the space, even if one project would slightly prefer the opposite direction. Consistency beats per-project optimization.
-
Install visual controls. Floor tape for zone boundaries, colored landing racks for incoming vs processed, labeled spots for shared equipment, shadow boards. Take reference photos of the correct state of each bench and post them at the bench.
-
Rewrite the affected SOP steps to reference zones and landing spots explicitly. This is the step that makes the change permanent instead of decorative.
-
Add the bench-open/close checklist and run it for two weeks with a supervisor spot-checking, then hand ownership to whoever opens the bench.
-
Re-walk a sample and re-photograph. Compare the new flow map to your baseline. Count the eliminated crossings and shared surfaces. That count is your before/after evidence.
Below is a simple diagram that captures the one-way flow concept described above.
The photo templates matter more than people expect. A posted photo of "what this bench should look like at open" removes all ambiguity and makes the close-out checklist a matter of comparing reality to a picture. It's the same logic that makes photo-based verification work well for rack mapping in shared freezers — a reference image beats a paragraph of description every time.
A small-lab worked example
Consider a translational research lab with five people sharing two main benches across three projects. Before the retrofit, accessioning and processing happened on the same bench with no fixed landing spots. Their handling-error log — mislabels, wrong-rack placements, one confirmed cross-contamination — was running at roughly 8–10 events per quarter, most tagged "operator error" with a retraining note.
The as-is flow walk found the problem quickly: incoming and processed samples shared the same three-rack area near the centrifuge, and two people accessioning at once just used whichever rack slot was open. Samples routinely backtracked across that shared area.
The retrofit was cheap — floor tape, four colored rack sets, relocating reagent stock off the processing bench, and about half a day of SOP rewriting. They defined a strict left-to-right flow: accession on the left (blue racks), process in the middle, processed samples land on the right (green racks), nothing moves right-to-left. Reference photos went up at each bench, and the open/close checklist went live.
Over the next two quarters, handling errors dropped to around 2–3 per quarter. The ones that remained were genuinely procedural rather than "wrong tube" mistakes. Nothing about the people changed. The room stopped forcing the errors. When they later audited a mislabel, the flow map made the investigation faster too — there were far fewer places where a mix-up could have physically happened.
When this makes sense — and when it doesn't
When a bench redesign clearly pays off:
-
You have concurrent users on shared benches
-
Your CAPA log has repeated "operator error" entries at the same physical locations
-
You run tests and controls in the same space
-
You're onboarding new people who keep making "beginner" mistakes at specific benches
When it's overkill:
-
Single operator, single project, plenty of space — the room isn't your bottleneck
-
You're moving to a new facility in a few months anyway; wait and design it right the first time
-
Your error signal points clearly at instruments, reagents, or data handling rather than physical mix-ups
Who should hold off on a full retrofit: labs that haven't first mapped their sample lifecycle and handoffs. If you don't know your sample states and transitions, you'll tape zones around a process you don't fully understand and end up redoing it. Sort the process logic first, then let the physical layout follow.
The connection people miss
Bench layout, sample flow design, and your SOPs aren't three separate projects. They're one control system expressed in three different media — floor and furniture, movement, and paper. When they agree, the room quietly prevents errors before they reach your QC checks. When they disagree, people default to what the room physically allows, your SOP becomes fiction, and your CAPA log fills with retraining notes that never actually fix anything.
The labs that get this right don't necessarily have nicer benches or bigger budgets. They have benches that match their process, visual cues that make the right action the easy action, and a two-minute daily check that keeps the design from drifting back into chaos.
Start with a single sample walk and a camera. The crossings you find on that first walk will tell you exactly where your handling errors have been coming from all along.
The labs that get this right don't necessarily have nicer benches or bigger budgets. They have benches that match their process, visual cues that make the right action the easy action, and a two-minute daily check that keeps the design from drifting back into chaos.
Start with a single sample walk and a camera. The crossings you find on that first walk will tell you exactly where your handling errors have been coming from all along.
Ready to upgrade your lab operations?
Join 500+ labs using Labioly to save time, reduce errors, and enhance productivity and compliance.